Crochet Birthday Cards with Balloons

I love that you wish to make such a unique handmade card for a special person in your life. And I also love that you are stopping by to let me give your some inspiration for how to make your crochet birthday cards!
These crochet birthday cards give a truly personal touch to any gift, be it a thing or a gift card, and it can also be a gift in itself. What better way to show someone that you care, than through giving them a homemade and unique card.
In this post you find all the instructions for making this adorable card. First you crochet the balloons following my free and easy pattern, before putting it all together.
So, lets get this thing going, and lets have fun!

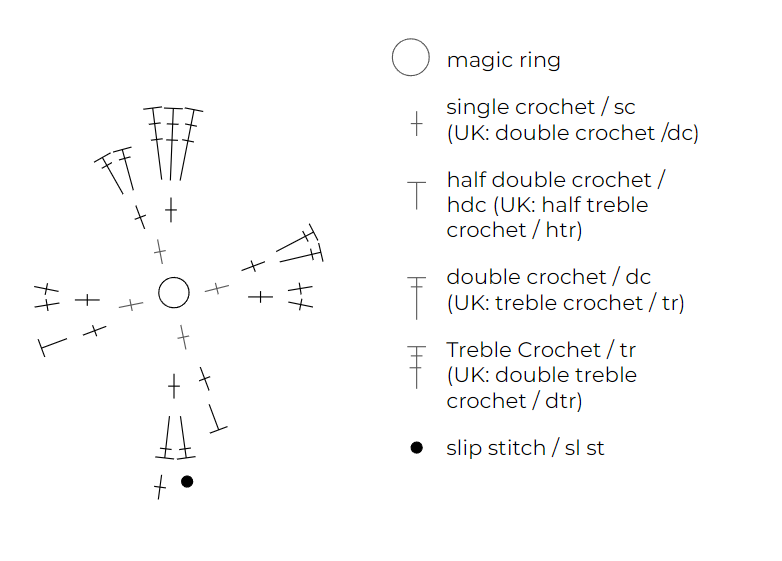
Crochet stitches used to make these cute balloons
To make the balloons you only need to use basic crochet stitches.
The most advanced part of the balloons is the magic circle you make at the beginning. If you are not comfortable with the magic circle yet you can check out the link below, or you can do the alternative method using chain stitches (described with the pattern further down).
- Magic circle
- single crochet / sc (US), double crochet /dc (UK)
- half double crochet / hdc (US), half treble crochet / htr (UK)
- double crochet / dc (US), treble crochet / tr (UK)
- Treble Crochet / tr (US), double treble crochet / dtr (UK)
- slip stitch / sl st
You can have a look at this post to find links to short video tutorials for all the stitches and the magic circle used in this pattern.
What you need to make your crochet birthday cards
To make these cards you need some tools and materials. You should be able to get most if not all of these at your local hobby shop.
- Crochet hook 1.5 or 2.0, depending on the yarn/thread you use
- Yarn/thread in 3-5 different colors
- A pair of sizzors
- A pen and a ruler, or a utility knife, a cutting mat and a ruler
- Craft paper
- Craft paper with prints
- Fast-drying glue
- For one of the card designs I have also used small alphabet beads to spell out “Happy Birthday”. You can also use stickers or other materials – it`s your design!
Now that you have all the equipment and materials you need, let`s make some fantastic crochet birtday cards!
Let me show you how to make them
Step 1: Make the balloons
The first step in making these cute diy birthday cards is to crochet the balloons. For a card you will need 3 or 5 baloons, depending on the design you go for. Or you can make up your own design with as many birthday balloons as you like.
Happy crocheting!
Crochet hook 1.5 or 2.0 depending on the yarn you use. I have used cotton yarn 8 m and crochet hook 2.0.
(For the baloons on some of the other cards in the photos I used very thin cotton yarn and crochet hook 1.5).
Follow this easy free pattern to make your crochet balloons: the pattern and the direction in which you crochet is illustrated in the two images below. You can find the full written instructions below the images.
To avoid confusion, note that I use the US names for the stitches (check the first image above if you are used to the UK naming).
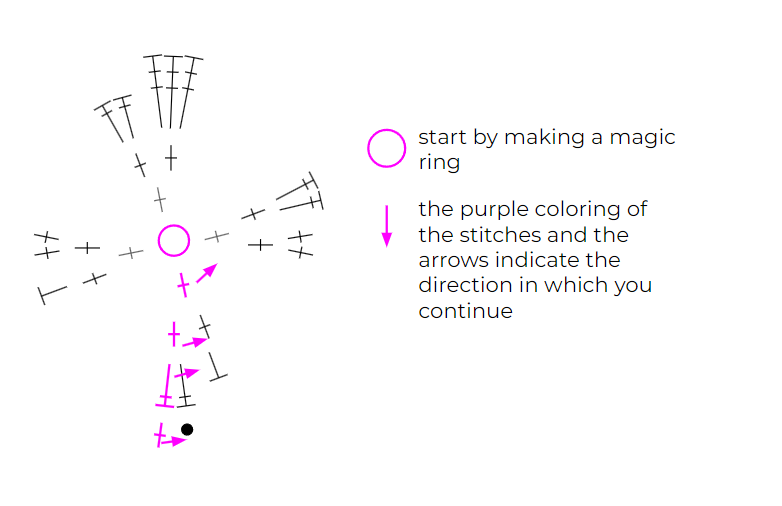
Written instructions:
- Start by making a magic circle.
I know some crochet beginners may struggle with the magic cirle technique. If you are one of them, dont worry, Ive got you. An alternative to the magic circle is that you make a loop, then crochet two chain stitches, and combine the last and the first stitch with a slip stitch. Or you can check out my post with info on 4 different ways to make a magic circle. - Crochet 4 single crochet stitches around the magic circle (4 stitches in total after this round).
(If you went for the chain stitch alternative to the magic circle. Crochet 4 single crochet stitches through the center of the circle you have made by combining the chain stitches (4 stitches in total after this round) - Crochet 2 single crochet stitches in each of the stitches from the previous round (8 stitches in total after this round).
- Crochet 2 double crochet stitches in the first stitch from the previous round
1 half double crochet in the next stitch
2 single crochet stitches in the next stitch
2 double crochet stitches in the next stitch
3 treble crochet stitches in the next stitch
2 double crochet stitches in the next stitch
2 single crochet stitches in the next stitch
1 half double crochet stitch in the next stitch - 1 single crochet in the next stitch (i.e. the first stitch from the previous round)
Crochet a slip stitch in the next stitch - Pull the thread through the loop of your slip stitch so you have about 15 cm of yarn through the slip stitch, leaving enough yarn for your ballon string. Cut the thread and pull the yarn through the slip stitch. Pull to fasten this final stitch.
YAY! Your first balloon is done! Now make 3, 5, or whatever number of balloons you want in different colors.
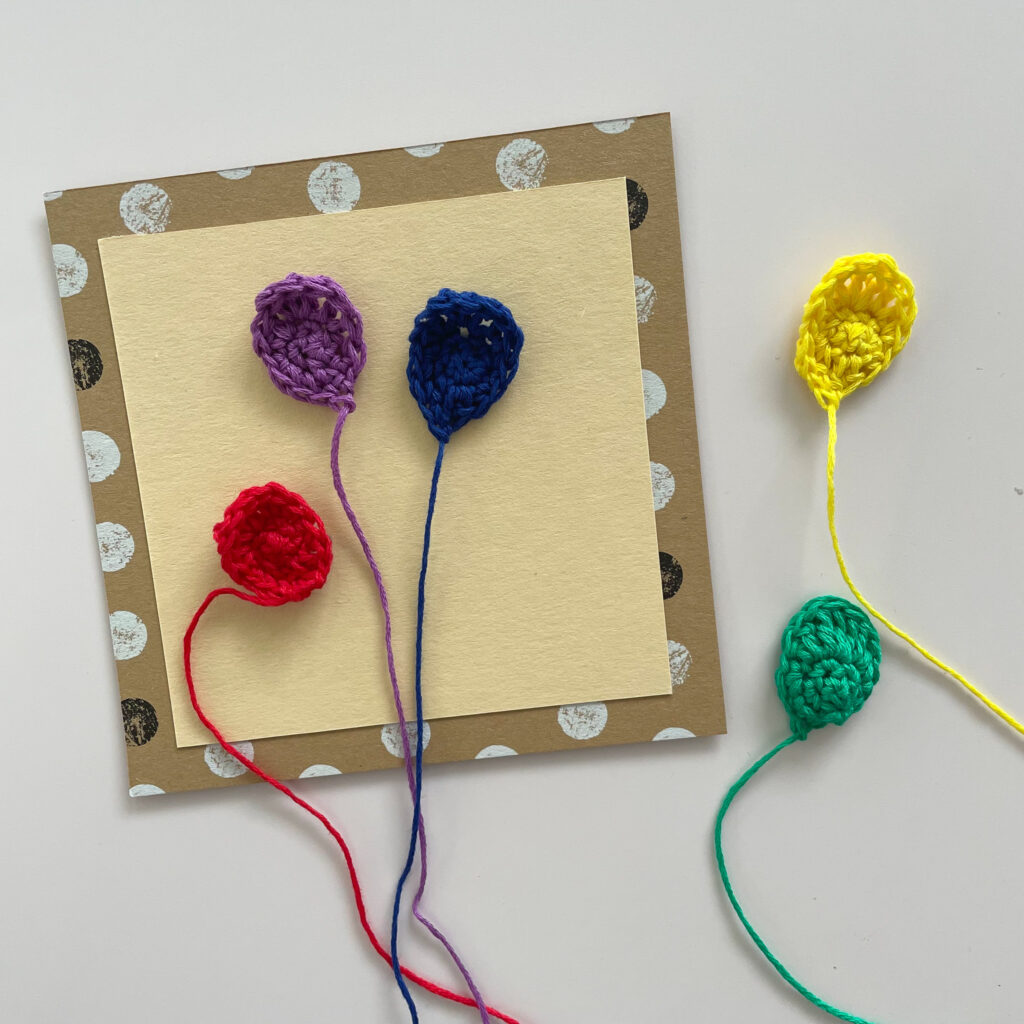
Step 2: Make the crochet card
I love this part! Seeing your card come together is so much fun! The card design described below is for a card with just the baloons on it.
Start by getting all your materials together to brainstorm how your unique design will look.

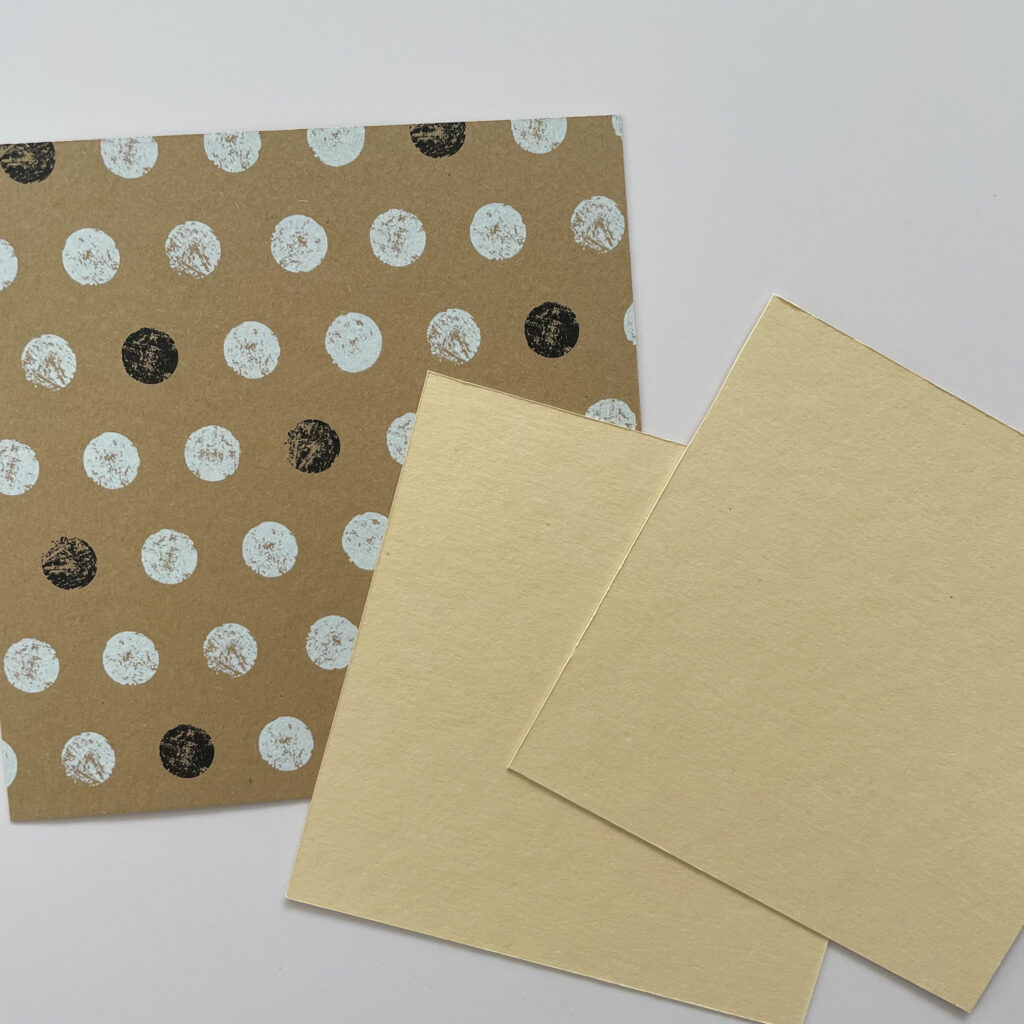
Prepare the craft paper. When using a mix of standard craft paper and craft paper with prints to make the card itself I prefer having the prints in the background, as a playful frame for the crochet balloons.
If you wish to play around with props like alphabet beats or stickers to write out “Happy Birthday” then you may want your card to have different dimensions than the ones I have used here to make room for the extra materials.
Here are some measurements I have used for the crochet birthday cards on the photos in this post:
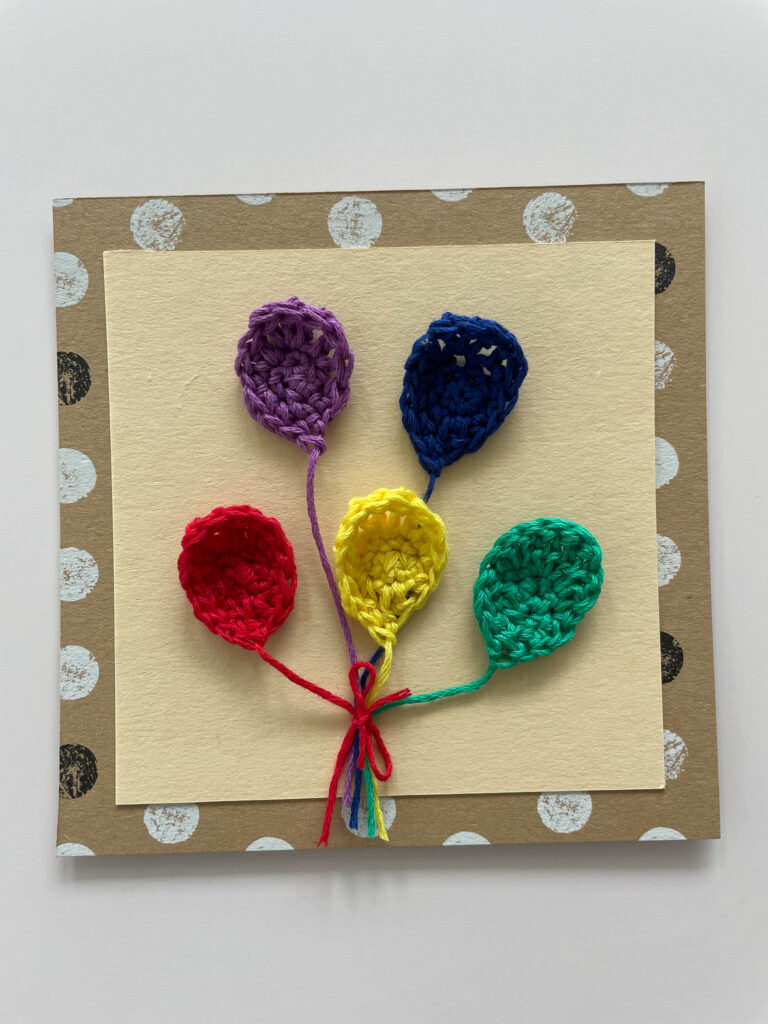
- The measurements used in these instructions: 1 x craft paper with prints 12×12 cm, 2 x single color craft paper 10×10 cm, (5 balloons)
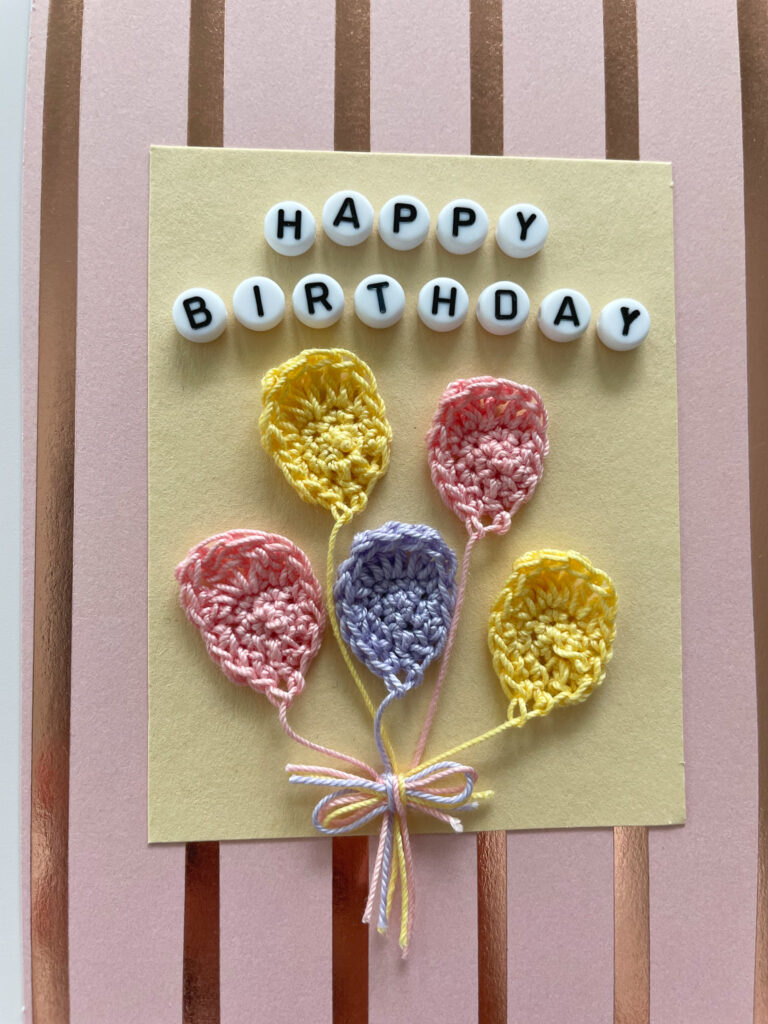
- 1 x craft paper with prints 15×10.5 cm, 2 x single color craft paper 9.5×7 cm, (5 balloons and “happy birthday” written with beads)
- 1 x craft paper with prints 14×10 cm, 2 x single color craft paper 10×7 cm, (5 balloons)
- 1 x craft paper with prints (I have used one with glitter) 17×13 cm, 1 x single color craft paper 14×6 cm for the front (3 balloons)
Cut your craft paper to your measurements using a utility knife, cutting mat and ruler, or by using a pen, ruler and a pair of sizzors.
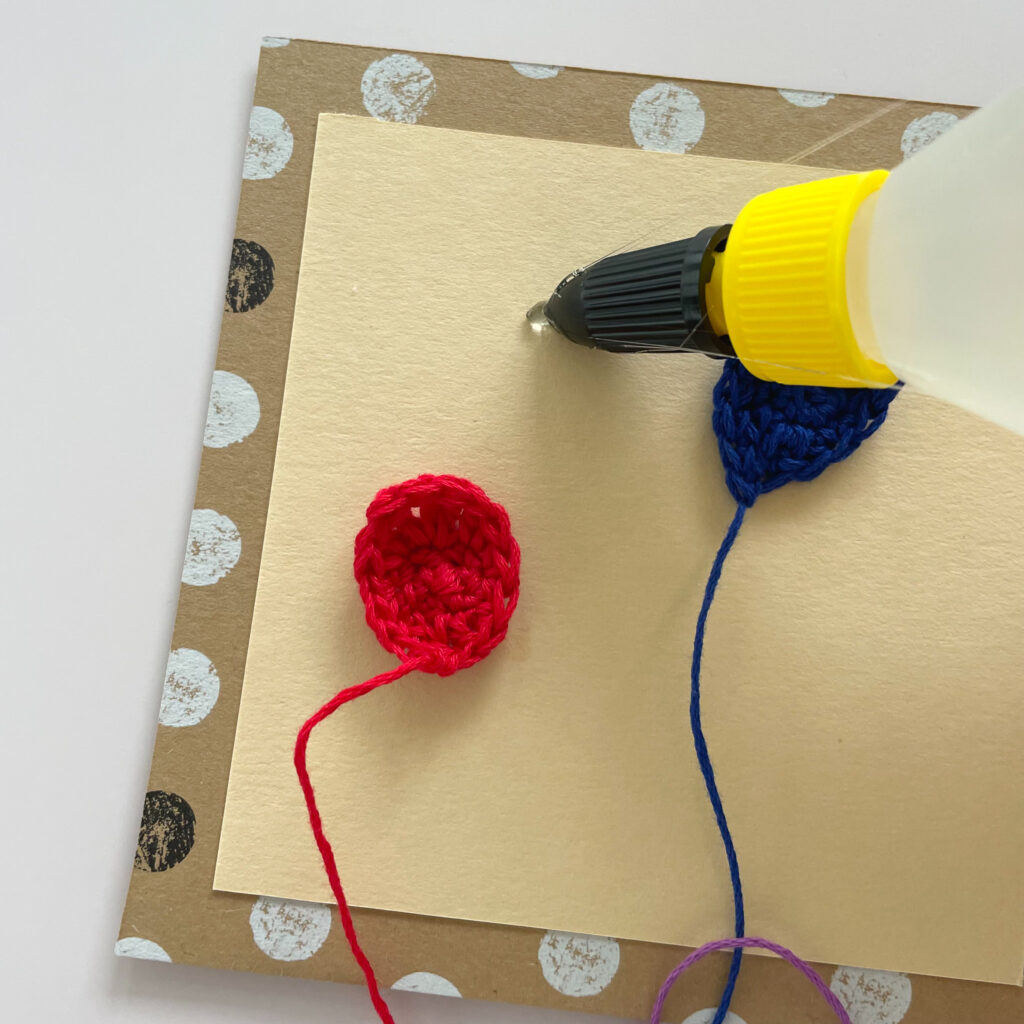
Glue your card together. Add glue to the back side of one of the single color craft paper cutouts, and glue it onto the craft paper with prints cutout on the non-print side (back side). You can center the single color craft paper or place it anyway you like. Now, take the second one of your single color craft paper cutouts, and glue it onto the craft paper with prints cutout on the print side (front side) Again, center it or not – it`s your design!
I like using fast drying hobby glue and not strong instant super glue, as I sometimes get it on my fingers and I prefer when my fingers don`t stick together permanently. Wait for a few minutes while the glue dries (assuming you are using fast-drying hobby glue).
Prepare the ballons. You have two threads / yarn ends coming out of your ballons. Take the thread that is coming out of the center of your balloon and cut it close to where it connects to your crochet ballon. Do not cut it right at the connection but leave a short thread, short enough to hide behind the ballon when you glue it onto your card. Do this for all the ballons. Do not throw these cut threads away, you can use one of them for the balloon string bow in a short bit.
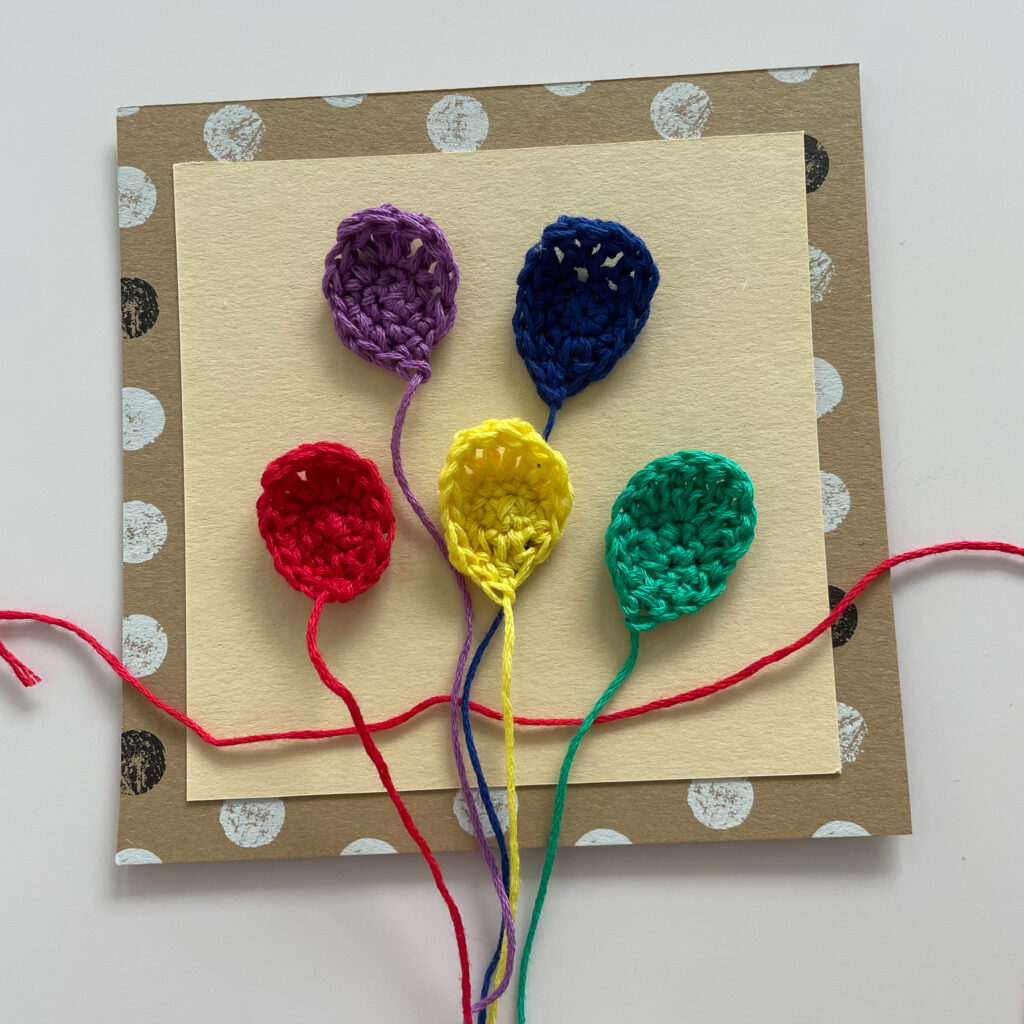
Now, time for a pre-run. Without adding any glue, place your balloons onto the card and try out different combinations and placements to see what you like better. Note that the side of the ballon where the (now) short thread is sticking out is the back side.
Glue the balloons onto your card. Once you have found a design you are happy with, glue the balloons in place. And wait a few minutes until the glue has dried.
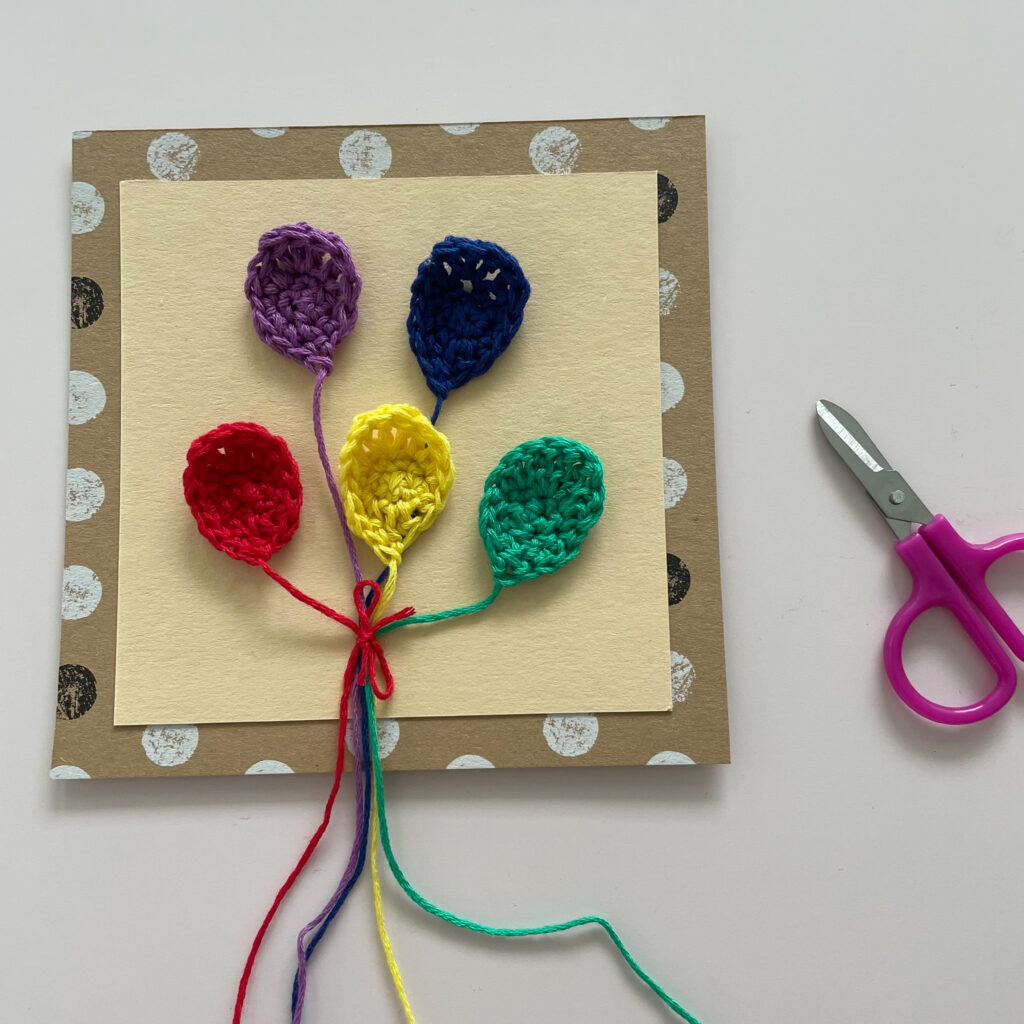
Tie your balloon strings together with a bow. Gather the balloon strings and tie a bow aroung the ballon strings, using one of the threads you cut off in a previous step. When you are happy with the bow and its placement on the balloon strings, fasten it and glue the bow to your card. Wait a few minutes till the glue has dried and your bow is stuck to your card. Then, take your sizzors, and cut the ballon strings beneatch the bow. I like cutting them in slightly varying lengths.
Step 3: Write your personal meassage
YAAAY! You did it! And I am sure your card looks amazing! Now it is time to add your personal message to the special someone that is lucky enough to get your crochet birthday card. Write your own message on the back of the card, to complete your handmade card.
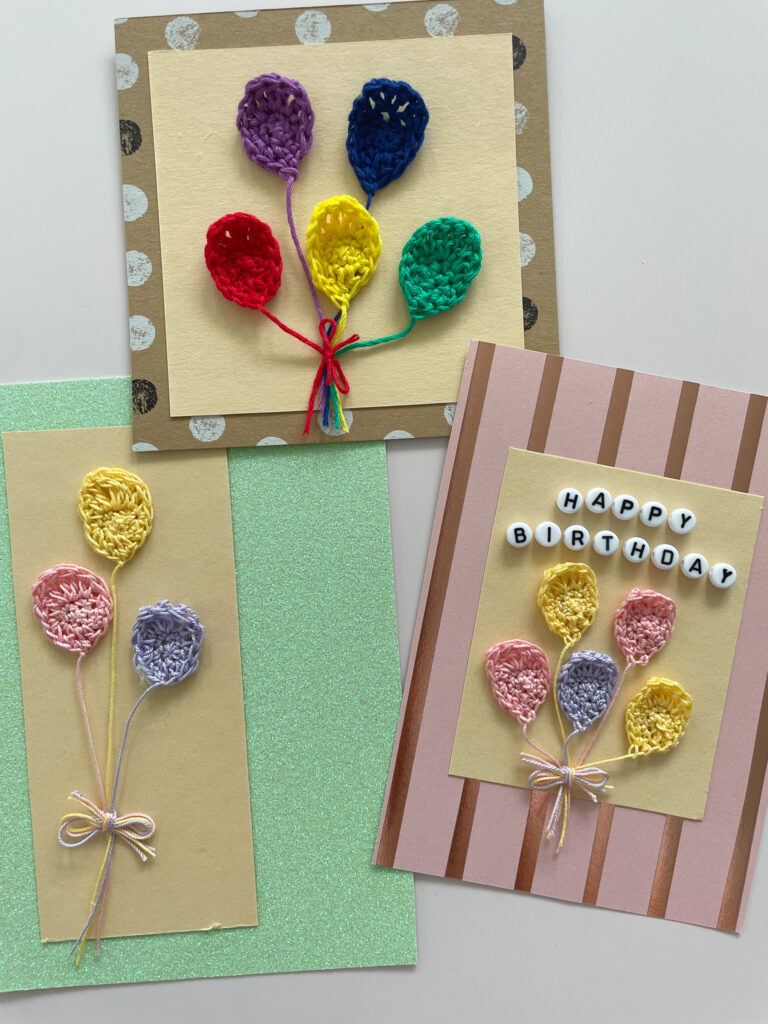
Inspiration for your crochet Birthday Cards
I like to try out different dessigns and layouts for the cards. And sometimes I also like adding some extra material like alphabet letters to spell out “happy birthday”, or “best mom” or “b-day girl, and so on 🙂
Here are some of the cards I have made with these crochet balloons: