Easy and Fun Christmas Card with Santa Hat Crochet Pattern

Make this year`s christmas card extra special – and have fun with it! If you are looking for crochet projects to get you in the christmas spirit this one is perfect!
The holiday season is coming up and the stores are stocking up on chrismas sweets and ornaments and I am so ready for it!
If you love easy and fun projects that you can curl up on the sofa with you should really try making this crochet santa hat pattern. In this post I give you the step-by-step instructions with the free crochet pattern. It is a really simple pattern and is perfect for any crochet skill level, also new crocheters.
This is a great project if you want to add that special personal touch to a christmas gift – and love – you give on christmas eve, or christmas day if that`s when you celebrate 🙂
Turn on your favorite christmas songs, grab your blanket and crochet needle, and let`s get started.

Crochet stitches used to make Santa`s hat
To make a simple crochet flower you only need to use basic crochet stitches.
- Magic circle
- chain stitch / ch
- single crochet / sc (US), double crochet /dc (UK)
- double crochet / dc (US), treble crochet / tr (UK)
- slip stitch / sl st
You can have a look at this post to find links to short video tutorials for all the basic stitches and the magic circle used in this pattern.
The most advanced part of crocheting the Santa`s hat is the magic circle you make at the beginning. If you are not comfortable with the magic circle yet you can check out the link above with video tutorials showing different ways to make one.
What you need to make your diy crochet Christmas cards
The crochet santa`s hat is just the right size to fit on a cute Christmas card.
To make these cards you need some tools and materials. You should be able to get most if not all of these at your local hobby shop.
- Hook size: crochet hook 2.0
- Yarn/thread in red and white (50 g, 160-170 meters)
- A yarn needle / tapestry needle
- A pair of sizzors
- A pen and a ruler, or a utility knife, a cutting mat and a ruler
- Craft paper
- Craft paper with prints
- Fast-drying hobby glue
Now that you have all the equipment and materials you need, let`s make some fantastic crochet cards!
Easy Crochet Santa Hat Pattern
This free pattern gives you a small crochet santa hat for a personal touch to your christmas cards.
Crochet hook 2.0 and thin red and white cotton yarn.
I use the US names for the stitches in this pattern.
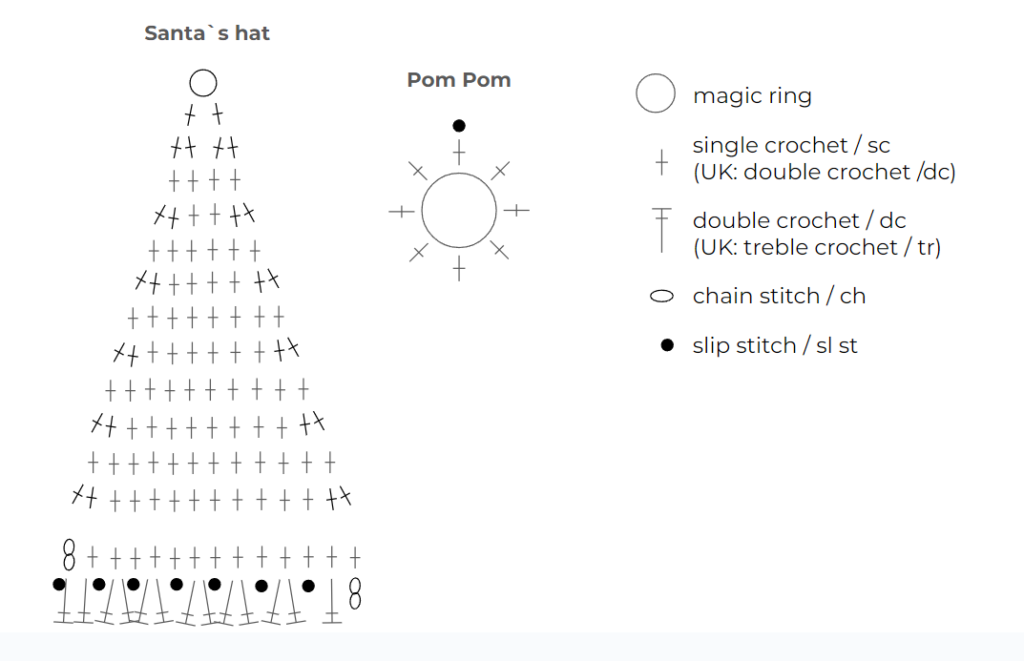
Santa`s hat
Red yarn in a classic red christmas color.
To crochet the red part of santa`s hat we do one single crochet in every stitch every other round, and increase with singcle crochet increase on both sides of the hat every other roung.
Starting from the top of the hat:
- Magic circle
- 2 single crochet (sc) stitches around the magic circle
- sc inc in each stitch (stitch count: 4 stitches total)
- one sc in each stitch (4 stitches total)
- sc inc, 2 sc, sc inc (6 stitches total)
- one sc in each stitch (6 stitches total)
- sc inc, 4 sc, sc inc (8 stitches total)
- one sc in each stitch (8 stitches total)
- sc inc, 6 sc, sc inc (10 stitches total)
- one sc in each stitch (10 stitches total)
- sc inc, 8 sc, sc inc (12 stitches total)
- one sc in each stitch (12 stitches total)
- sc inc, 10 sc, sc inc (14 stitches total)
- cut the yarn (leave some thread so it is easy to sow away later) and pull the thread through your last sc stitch from the last row
Change to white yarn to crochet the white band:
- do a slip stitch with the white yarn in the first stitch from the previous round on either side or the hat
- crochet 2 chain stitches (ch) and then crochet one single crochet stitch in the next stitch from the previous round. Continue with single crochet stitches in the remaining 12 stitches from the previous round.
For the last row we will shape the brim of the hat (still white yarn):
- crochet 2 chain stitches (ch) from the last stitch in the previous round
- do a double crochet (dc) stich in the next stitch.
- 1 slip stitch (sl st) in the next stitch
- 2 dc stitches in the next stitch
- 1 sl st in the next stitch
- 2 dc stitches in the next stitch
- 1 sl st in the next stitch
- 2 dc stitches in the next stitch
- 1 sl st in the next stitch
- 2 dc stitches in the next stitch
- 1 sl st in the next stitch
- 2 dc stitches in the next stitch
- 1 sl st and 1 dc stitch in the next stitch
- 1 dc and a 1 sl st in the next stitch
- cut the yarn (leave some thread so it is easy to sow away later) and pull the thread through you last chain stitch
The Pom Pom
White yarn
- Make a magic circle and crochet 8 single crochet stitches around the magic sircle, finish with a slip stitch through the first single crochet stitch to combine into a circle. Pull the thread coming out of the magic cirle (the center) tightly.
Sow away and hide the loose yarn ends
Grab your yarn needle and sow the loose yarn ends coming out from your Santa`s hat through some of the stitches on the back side of your hat (you choose what side is the back), and cut the threads so they are hidden on the back of your santa`s hat.
Also, sow away the yarn end from your pom pom, and cut the two threads rather short so they can be hidden behind the pom pom when you glue it to your card.
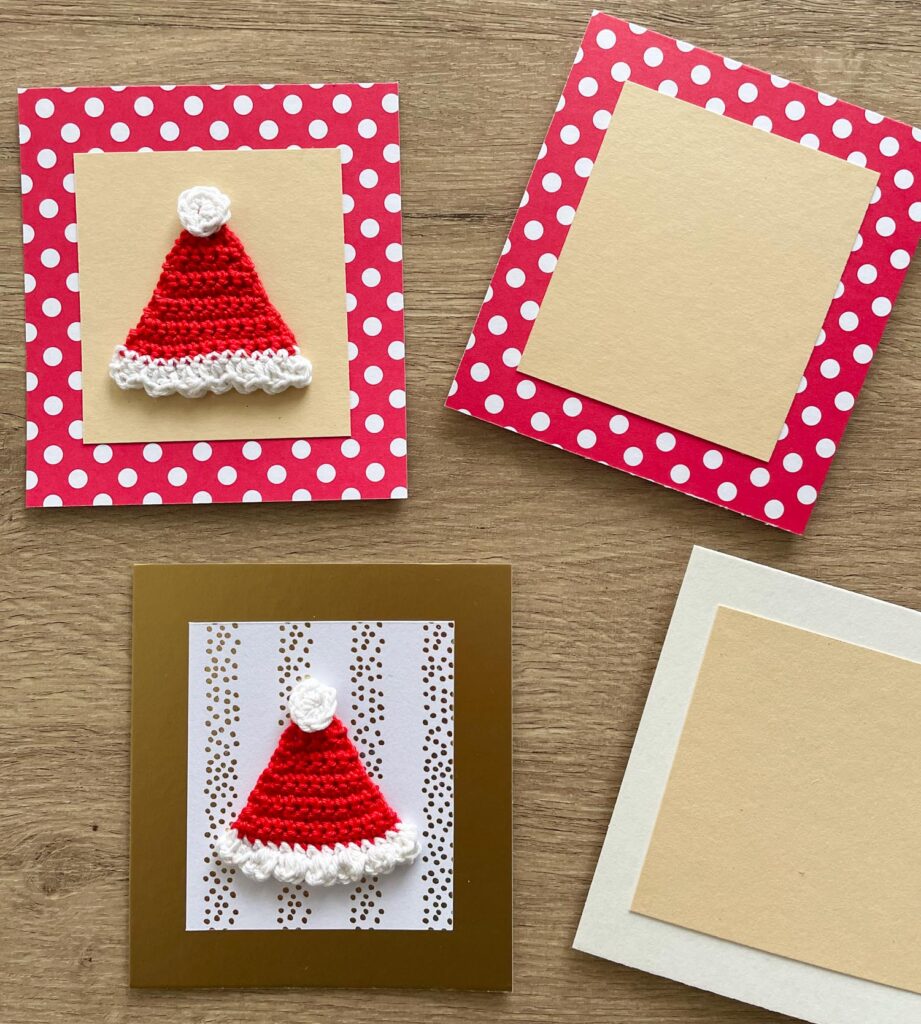
How to put your crochet Christmas card together
Prepare the craft paper. When using a mix of standard craft paper and craft paper with prints to make the card itself I alternate between having prints as the frame or as the background for Santa`s hat.
- 1 x craft paper with prints/single color craft paper 10×11 centimeters (the frame)
- 2 x craft paper with prints/single color craft paper 7×8 centimeters. One is used for the front of the card with Santa`s hat glued onto it, and the other one is for the back for your personal message.
Glue your card together. Start by gluing the smaller 2 craft papers onto the big one, one small on the back and one small on the front (both centered)
Glue the Santa`s hat onto your card. Start by gluing the Santa`s hat onto the front of your card, and then glue the white pom pom onto the top of your Santa`s hat:
- Add glue to the back side of Santa`s hat (the side where the yarn ends are visible) and glue it onto the front of your card.
- Add glue to the back of your pom pom (the side where the yarn ends are visible) and glue it onto the top of santa`s hat.
Use your Santa`s hat to make more Christmas Decorations
Aside from making your special christmas cards you can also glue your Santa`s hat on to other things like gift card holders, cookie jars or jam jars. I glued one on to my wild blueberry jam jar. This will fit perfectly on the breakfast table this christmas season 🙂
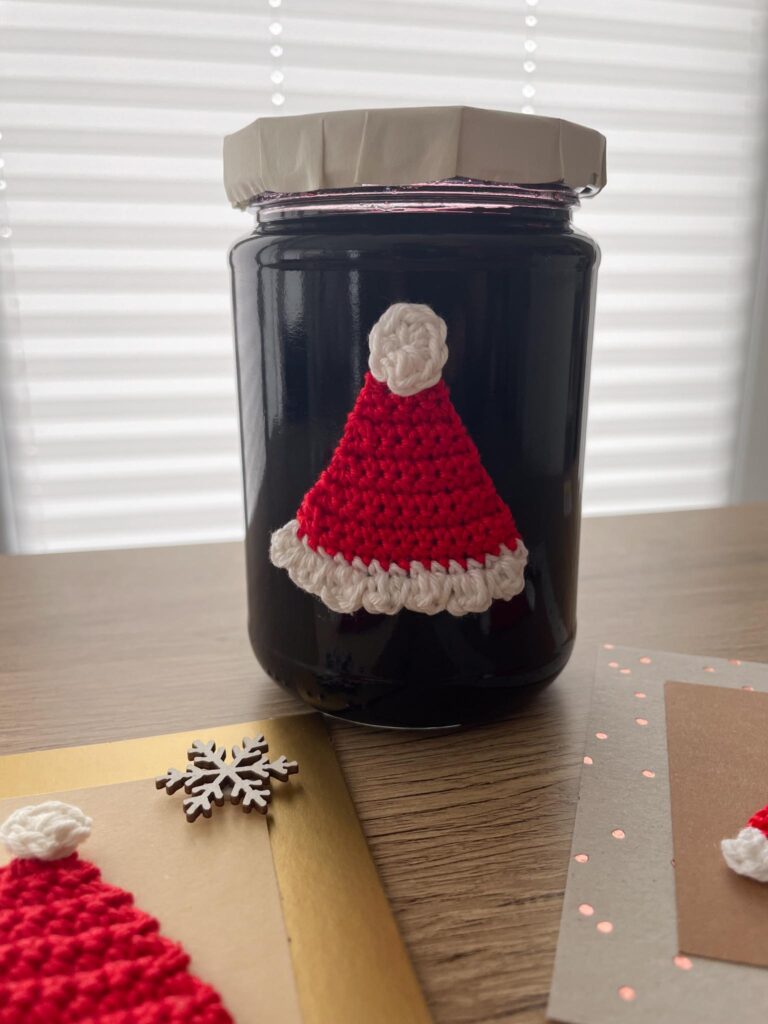
I am so ready for the big day!!
How about making Christmas cards with hats in different colors?!
You can also use this pattern and instructions to make crochet hats in different colors. The cards may be less “christmasy”, but they definitely also give winter wonderland vibes.

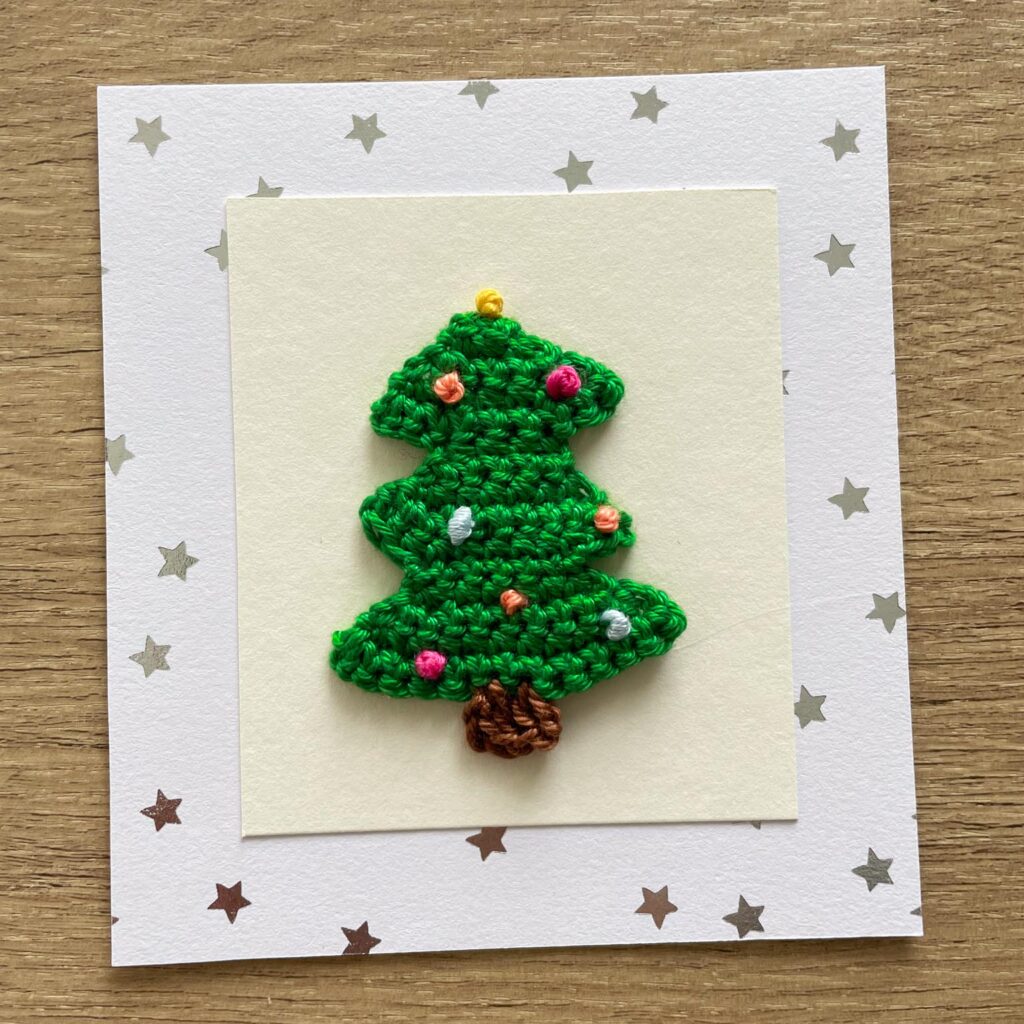
I love christmas crafts and I am working on more free christmas crochet patterns for festive cards and holiday decorations. So patterns for a crochet christmas tree and mistletoe are coming in the next weeks.
These projects will also use easy crochet patterns. The projects will also have detailed descriptions. So if you loved this one, then stay tuned!