Diy Cards with Easy Crochet Flowers

Surprise someone you love with a personal, beautiful and handmade flower bouquet! This diy card is a great gift in itself, and a great way to show someone you care.
In this blog post you can find my free pattern for easy crochet flowers, and I`ll show you how to crochet the cute flowers and how to put your card together.
This diy project is perfect for anyone – it doesn`t matter if your skill level is beginner or if your crochet skills are superb – you can make it!
Make a wonderful crochet flower bouquet using your favorite colors, and give an everlasting bouquet to someone special.
If you have friends or family who also love diy projects, then this can be a fun way to spend time together! My parents have been visitig from Norway these past few weeks for our wedding – and yesterday I showed my mom how to make these simple flowers and we made one card each. I think she loved it! And she even said she would order yarn as soon as she got home to make more cards.
So, let`s get this thing going, and lets have fun!
Crochet stitches used to make the flowers
To make a simple crochet flower you only need to use basic crochet stitches.
- Magic circle
- chain stitch ch
- single crochet / sc (US), double crochet /dc (UK)
- double crochet / dc (US), treble crochet / tr (UK)
- Treble Crochet / tr (US), double treble crochet / dtr (UK)
- slip stitch / sl st
You can have a look at this post to find links to short video tutorials for all the basic stitches and the magic circle used in this pattern.
The most advanced part of the flowers is the magic circle you make at the beginning. If you are not comfortable with the magic circle yet you can check out the link above with video tutorials showing different ways to make one.
What you need to make your diy crochet cards
To make these cards you need some tools and materials. You should be able to get most if not all of these at your local hobby shop.
- Hook size: crochet hook 2.0
- Yarn/thread in yellow (for the center), green (for the flower stalk) and at least three other colors for the flower petals (unless you want all flowers to be the same color). For the flowers I use this yarn from Anchor. I do not order it from their website as you can get better deals elsewhere if you google a little. But I wanted to link to their website to show you what type of yarn I use.
- A yarn needle
- A pair of sizzors
- A pen and a ruler, or a utility knife, a cutting mat and a ruler
- Craft paper
- Craft paper with prints
- Fast-drying hobby glue
- thread for binding the flowers – or you can simply use one of the colored yarns that you use for the flowers
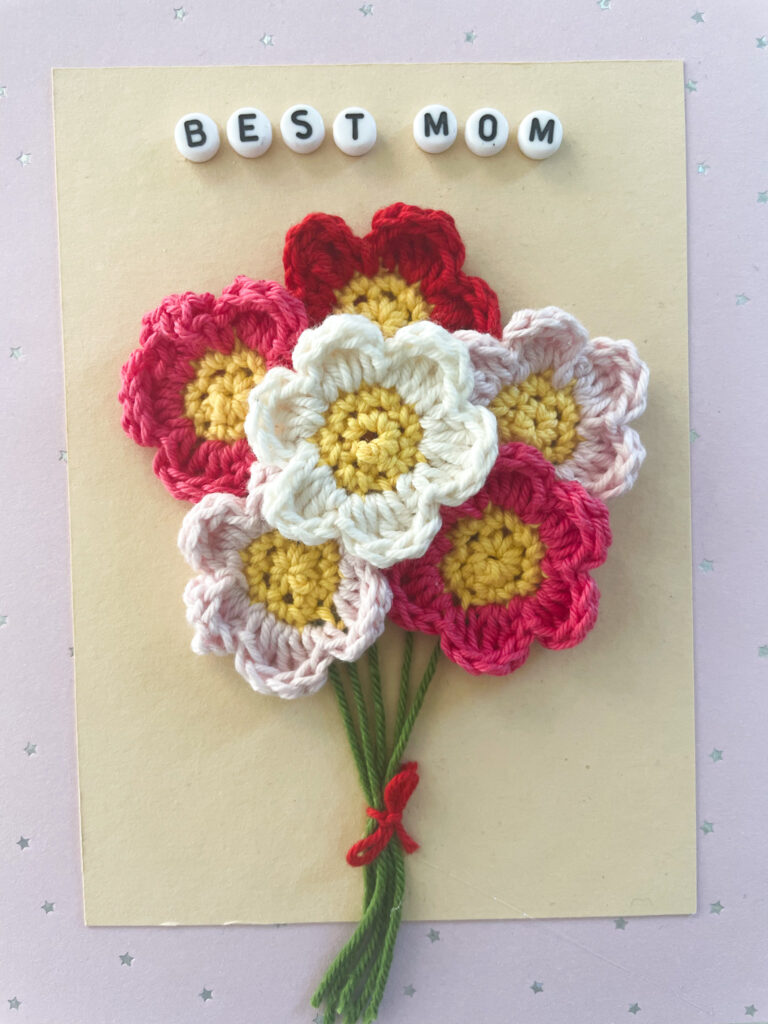
- For one of the card designs I have also used small alphabet beads to spell out “Best mom” as I want to give this to my mom for her birthday or maybe mothers day. You can also use stickers or other materials – it`s your design!
Now that you have all the equipment and materials you need, let`s make some fantastic crochet cards!
Let me show you how to make them
In this video tutorial I show you how to make the diy flower cards. I start by showing you how to make the beautiful crochet flowers, and then show you how to put your card together.
Step 1: Make the easy crochet flowers
The first step in making these cute diy crochet cards is to crochet the flowers following my easy pattern. For a card you will need 2, 3 or 6 flowers, depending on the design you go for. Or you can make up your own design with as many flowers as you want.
Happy crocheting!
Crochet hook 2.0. and cotton yarn.
Follow this easy crochet flower pattern: the pattern and the direction in which you crochet is illustrated in the images below. You can find the full written instructions below the images.
To avoid confusion, note that I use the US terms for the stitches (check the first image below if you are used to the UK naming).

Written instructions:
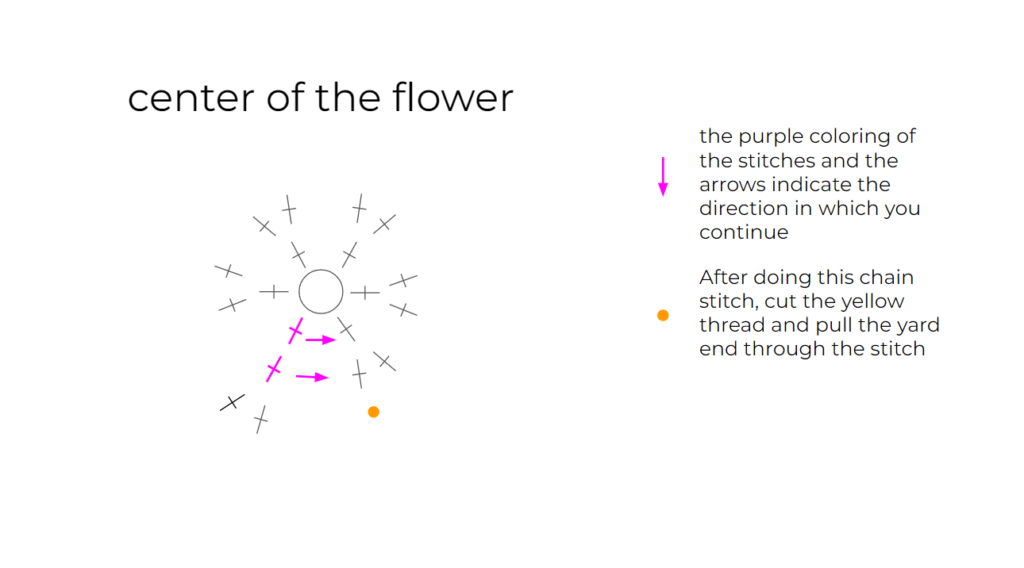
Start by making the center of the flower in yellow yarn:
- Make a magic circle.
I know some crochet beginners may struggle with the magic cirle technique. If you are one of them, dont worry, Ive got you. You can check out my post with info on 4 different ways to make a magic circle. - Crochet 6 single crochet stitches around the magic circle (6 stitches in total after this round). And pull on the yarn end of your magic circle to tighten the center.
- Crochet 1 single crochet stitch in the first stitch from the previous round, and then crochet 2 single crochet stitches in each of the following six stitches (12 stitches in total after this round).
- Crochet a slip stitch in the next stitch
- Pull the thread through the loop of your slip stitch. Cut the thread and pull the yarn through the slip stitch.
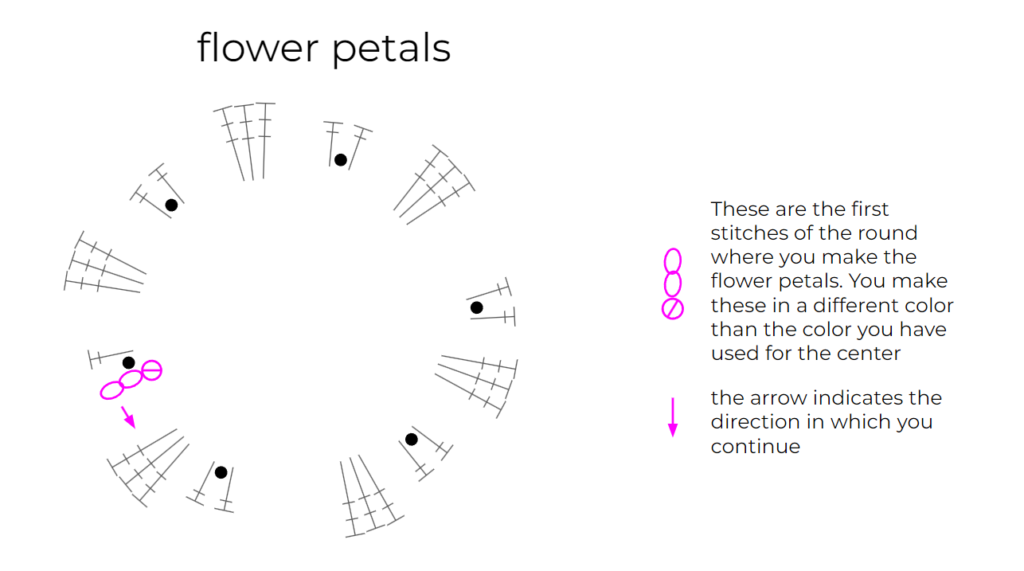
Then make the flower petals in the colors you like
- Start with new yarn in the color you wish to use for your flower petals. Loop the yarn through one of the 12 outer masks of the yellow flower center. This should not be the mask where you have your slip stitch (from the flower center work), but any other mask.
- Crochet 2 chain stitches
- Crochet 3 treble crochet stitches in the next stitch
- 1 double crochet, then 1 slip stitch, then 1 double crochet all in the next stitch
- 3 treble crochet stitches in the next stitch
- 1 double crochet, then 1 slip stitch, then 1 double crochet all in the next stitch
- 3 treble crochet stitches in the next stitch
- 1 double crochet, then 1 slip stitch, then 1 double crochet all in the next stitch
- 3 treble crochet stitches in the next stitch
- 1 double crochet, then 1 slip stitch, then 1 double crochet all in the next stitch
- 3 treble crochet stitches in the next stitch
- 1 double crochet, then 1 slip stitch, then 1 double crochet all in the next stitch
- 3 treble crochet stitches in the next stitch
- Now you crochet 1 double crochet and then a slip stitch in the next stitch, this should be the stitch you started the round in (and should have the two chain stitches in it from the first step in making the first petal).
- Pull the thread through the loop of your slip stitch. Cut the thread and pull the yarn through the slip stitch. Pull to fasten this final stitch.
You have now made a flower. It is time to fasten the thread from the last slip stitch in the flower petals. Take a needle and thread the yarn end from the flower petals. Sow it through one of the stitches in the first flower petal you made. Make sure you sow it through a stitch on the back of the flower. The side where the thread is coming out of your magic circle is the back side. Pull the thread a little.
You may want to tighten the center of your flower. To do so, simply pull on the thread coming out of the magic circle to tighten/close the center. Now, cut all the yarn ends coming out of your flower so short that you can hide them behind the flower when you glue it onto your card. Cut them short but not too short, about 1/2 – 1 cm should do.
YAY! Your first flower is done! Now make 2, 3, 6, or whatever number of flowers you want with either the same or different colors for the flower petals.
Step 2: Make the crochet card
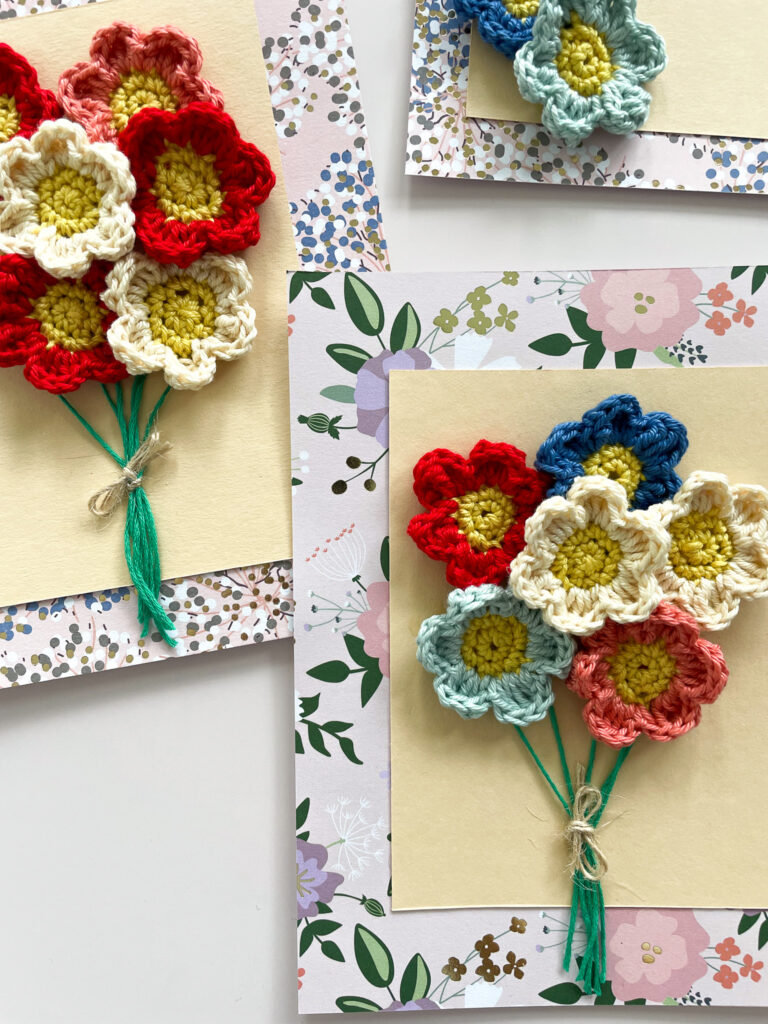
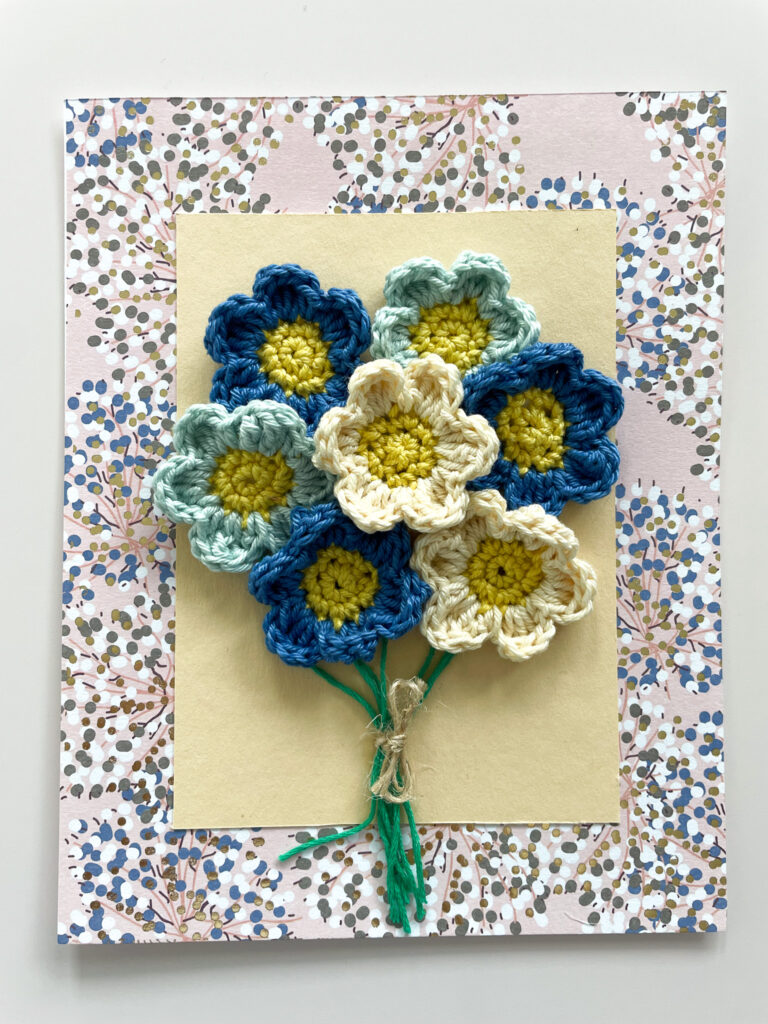
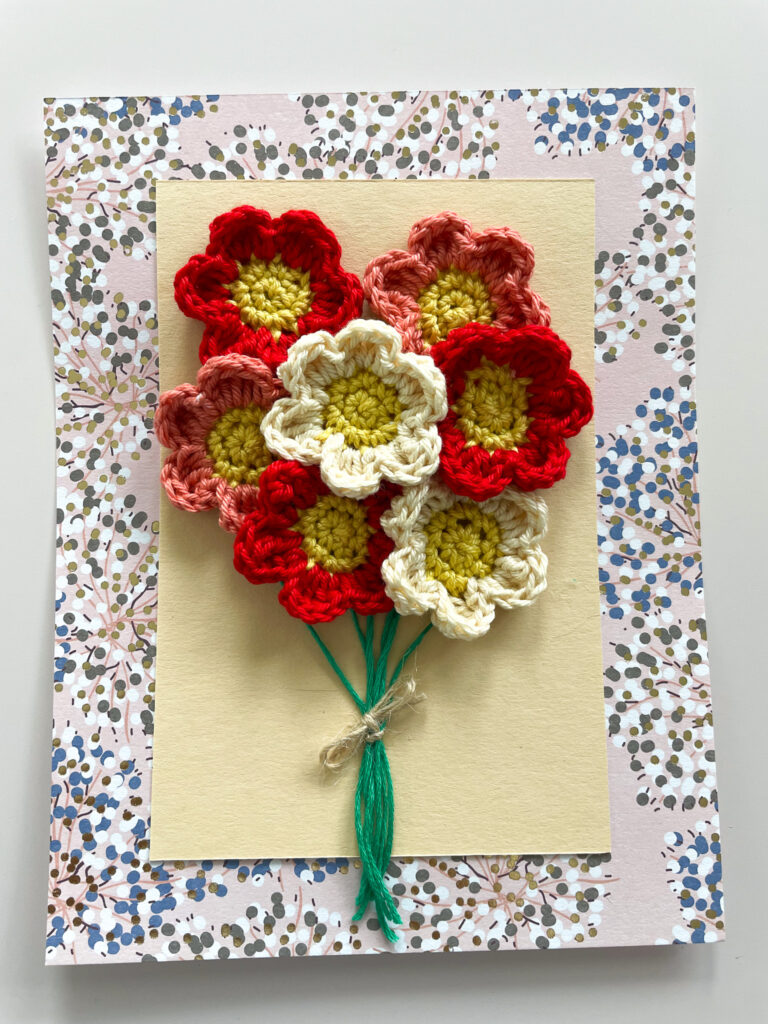
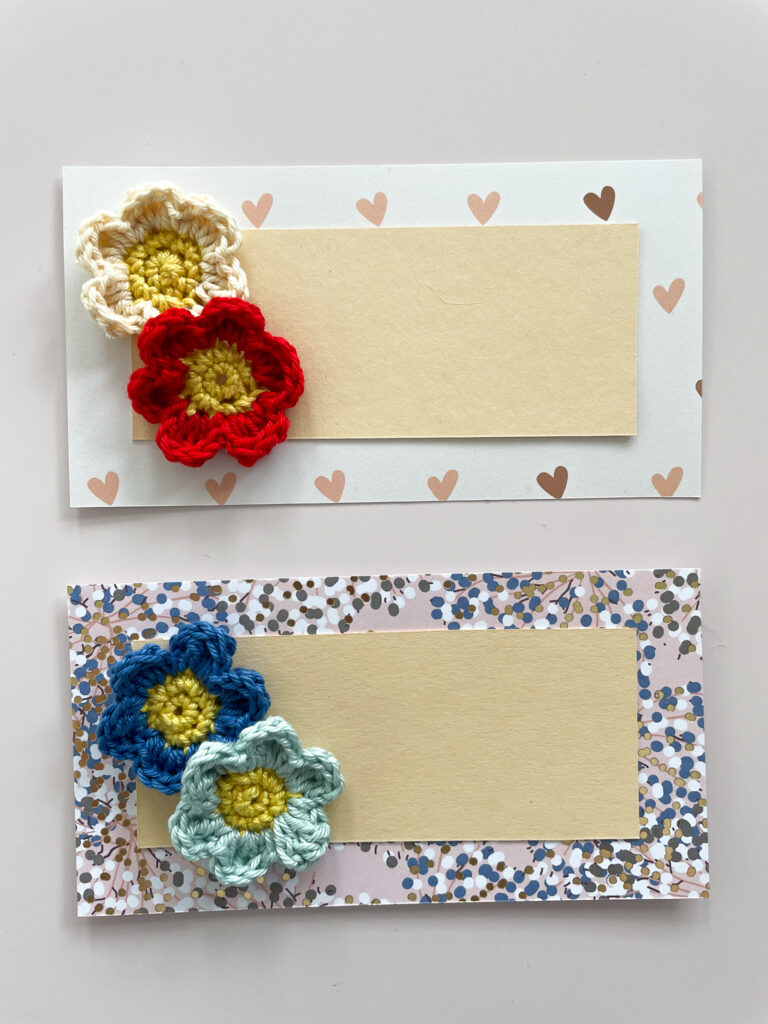
I love this part! Seeing your card come together is so much fun! The card design described below is for a card with six flowers on it, and can also easily be applied if you make a card with three flowers.
Start by getting all your materials together to brainstorm how your unique design will look.


Prepare the craft paper. When using a mix of standard craft paper and craft paper with prints to make the card itself I prefer having the prints in the background, as a playful frame for the crochet flowers.
If you wish to play around with props like alphabet beats or stickers to write out “Happy Birthday”, “best mom”, “best dad” or something else then you may want your card to have different dimensions (maybe be a bit taller) than the ones I have used here to make room for the extra materials.
Here are some measurements I have used for the crochet flower cards on the photos in this post:
- The measurements used in these instructions: 1 x craft paper with prints 16×14 cm, 2 x single color craft paper 12×10 cm, (6 flowers with stems)
- 1 x craft paper with prints 15×8 cm, 2 x single color craft paper 12×5 cm, (2 flowers, no stems)
- 1 x craft paper with prints 14×13 cm, 2 x single color craft paper 10×11 cm, (3 flowers with stems)
Cut your craft paper to your measurements using a utility knife, cutting mat and ruler, or by using a pen, ruler and a pair of sizzors.
Glue your card together. Add glue to the back side of one of the single color craft paper cutouts, and glue it onto the craft paper with prints cutout on the non-print side (back side). You can center the single color craft paper or place it anyway you like. Now, take the second one of your single color craft paper cutouts, and glue it onto the craft paper with prints cutout on the print side (front side) Again, center it or not – it`s your design!
I like using fast drying hobby glue and not strong instant super glue, as I sometimes get it on my fingers and I prefer when my fingers don`t stick together permanently. Sometimes I also adjust the placement of the craft paper or the flower slighthly shortly after gluing it on. This can be done perfectly easy when working with hobby glue. But when using instant super glue, it is stuck where you placed it in no time.
After gluing the craft paper onto the craft paper with prints, wait for a few minutes while the glue dries (assuming you are using fast-drying hobby glue).
Add the flower stems to your flowers. Cut the “stems” for your flowers using green yarn. Make sure to leave the stems long enough for them to go all the way to the bottom of the card. Use a needle to sow one of the green yarn ends through a stitch on the back of your flower. Note that the side of the flowers where the short threads are sticking out is the back side. Add stems to 5 of the 6 flowers. Do not add a stem to the flower that goes in the center of the bouquet, as this is the one you glue on last.
Now, time for a pre-run. Without adding any glue, place your flowers onto the card and try out different combinations and placements to see what you like better. If you have flowers in different colors it is important to arrange your bouquet prior to gluing it on.
Glue the crochet flowers onto your card. Once you have found a design you are happy with, glue the flowers in place. You do so by adding glue to the back of the flowers (do not add glue to the stem itself) and placing them on the card. Start with gluing the top flower(s) of your bouquet on first, this is important as you want the stems to go behind the lower and middle flowers and not over/in front of them. See the video tutorial or the photos in this blog post for inspiration on how to arrange your flowers. Finally, glue the last flower (no stem) in the center of the bouquet.Wait a few minutes until the glue has dried.
Tie your flower stems together with a bow. Gather the flower stems and tie a bow around the stems using a rough thread, or using scrap yarn in one of the colors you have. When you are happy with the bow and its placement, fasten/tighten it. You can now also pull slightly on the ends of the “flower stems” coming out of your bow if you want to tighten the stems/make them more straight. Then, glue the bow to your card. Wait a few minutes till the glue has dried and your bow is stuck to your card. Then, take your sizzors, and cut the ends of the flower stems beneath the bow. I like cutting them in slightly varying lengths.
Step 3: Write your personal meassage
YAAAY! You did it! And I am sure your card looks amazing! Now it is time to add your personal message to the special someone that is lucky enough to get your handmade crochet card. Write your own message on the back of the card.
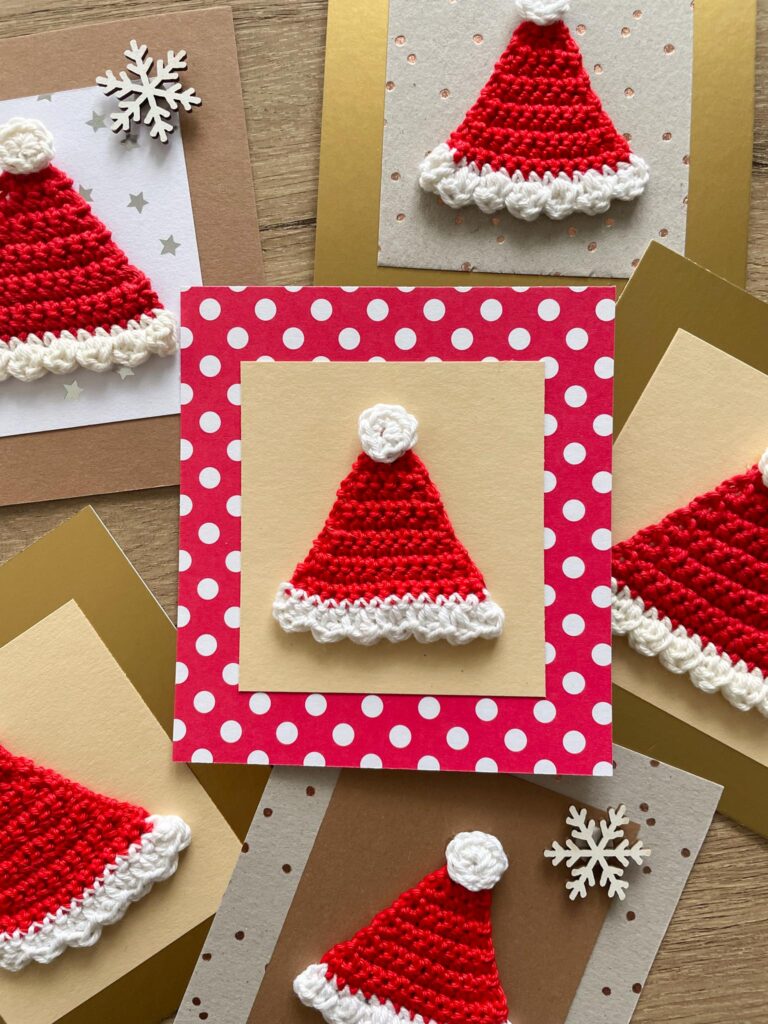
Inspiration for your diy crochet flower cards
I like to try out different designs and layouts for the cards, and using varying amounts of flowers on the cards. It is also fun to play around with colors. Sometimes I also like adding some extra material like alphabet letters to add a message on the front of the cards.
On the photos below you can see some of the cards I have made with these easy crochet flowers.
I hope you feel inspired to try this easy crochet project, and make some beautiful and personal cards!
If you loved making this and you are looking for more crochet projects, you will for sure also like making these crochet birthday cards with balloons.